A dripping faucet wastes water, raises your bill, and makes an annoying sound you can’t ignore forever. The good news: most leaky faucets can be fixed at home with basic tools and a bit of patience. This guide walks you through a clear, step‑by‑step repair process so you can stop the drip, protect your fixtures, and feel more confident tackling future home repairs.
Understand Your Faucet Before You Grab Tools
Before you start disassembling anything, it helps to know what you’re working on. Most household sink faucets fall into four main types: compression, cartridge, ceramic disc, and ball. The internal parts differ, but the overall repair approach is similar: shut off water, take it apart carefully, replace worn components, and reassemble.
Look closely at your faucet:
- If it has separate hot and cold handles you twist, it’s often a compression faucet.
- If it has a single lever you move up/down and side to side, it’s usually a cartridge, ceramic disc, or ball faucet.
- If you feel smooth movement with a short “throw,” it may be ceramic disc; if it feels looser with more range, it may be a ball faucet.
Even if you can’t identify the exact type, you can still repair it: you’ll be opening it, inspecting parts, and replacing the worn seals, washers, or cartridges. The key is to move slowly, keep parts organized in order, and take photos with your phone as you go so reassembly is straightforward.
Step 1: Prep the Area and Shut Off the Water
Good prep prevents bigger headaches. A few minutes here can save you from wet cabinets and missing parts.
Clear the sink and cabinet
Remove everything from around and under the sink—soap bottles, cleaning supplies, and anything that could get wet or knock into you. This gives you space to work and keeps items clean.
Gather basic tools and materials
You’ll typically need: - Adjustable wrench or a small set of wrenches - Phillips and flathead screwdrivers - Allen (hex) wrench set (often needed for single‑handle faucets) - Plumber’s grease (silicone-based) - Replacement parts: washers, O‑rings, or a new cartridge (you may buy this after you open the faucet and identify the part) - Towel or small bucket for drips
Shut off the water supply
Look under the sink for two small valves (one for hot, one for cold). Turn each valve clockwise until it stops. If the valves are stuck or missing, you may need to shut off the main water supply to the house at your main shutoff valve.
Relieve pressure in the lines
Turn the faucet handles on and let any remaining water run out. Once it slows to a trickle and stops, you know the supply is off and the pressure is released.
Plug the drain
Use a sink plug or even a rolled-up rag to block the drain opening. This prevents tiny screws or parts from dropping into the plumbing where they’re difficult or impossible to retrieve.
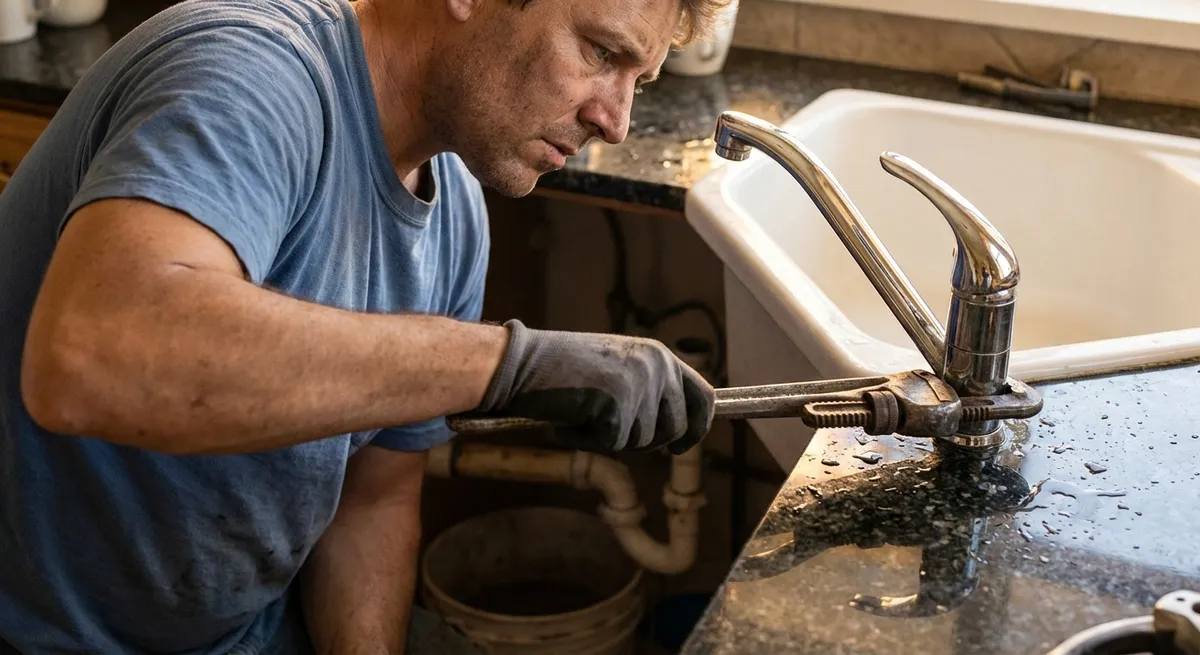
Step 2: Disassemble the Faucet Carefully
Taking the faucet apart is straightforward if you go slowly and keep track of the order of parts.
Locate and remove decorative caps
Many handles have a small plastic or metal cap labeled “H” or “C.” Gently pry it off with a flathead screwdriver or utility knife. Underneath, you’ll find a screw that holds the handle in place.
Remove the handle
- For two-handle faucets, unscrew the handle screw and lift the handle off. - For single-handle faucets, you may need an Allen wrench to loosen a set screw on the side or back of the handle. Once loosened, lift the handle straight up.
Document each step
Take a quick photo after each layer you remove: handle, trim pieces, retaining nuts, internal components. These photos act like a custom reassembly guide specific to your faucet.
Remove the retaining hardware
Under the handle, you’ll typically see a nut or retaining ring holding the internal valve or cartridge in place. Use an adjustable wrench or pliers carefully (avoid scratching exposed finishes by wrapping jaws with tape or using a cloth).
Extract the internal part
- Cartridge or ceramic disc: Pull it straight up. Some may need a gentle wiggle; don’t force it too hard. - Compression faucet: Unscrew the valve stem from the body of the faucet. As you remove the part, note its orientation (this matters for correct reassembly).
Keep the parts in order on a towel in the same layout you removed them. This makes it easy to identify what goes where later.
Step 3: Identify the Problem Part and Get the Right Replacement
Leaks usually come from worn rubber parts, mineral buildup, or a failing cartridge. Fixing the drip is a matter of finding the specific component that’s no longer sealing properly.
Inspect O‑rings and rubber washers
Look for: - Cracks, flattening, or pieces missing - Stiffness or brittleness when you bend them - Obvious deformation or stretching Any worn seal should be replaced rather than reused.
Check the valve seat (for compression faucets)
The valve seat is the small metal surface inside the faucet body that the rubber washer presses against. If it’s rough, pitted, or corroded, it won’t seal well. Light mineral deposits can sometimes be cleaned with a non-abrasive pad; deep damage may need a valve seat replacement tool or a plumber.
Examine cartridges or ceramic discs
If the faucet uses a cartridge or ceramic disc assembly and you’ve ruled out obvious seal issues, the internal mechanism may be worn. Cartridges are typically replaced as a complete unit rather than repaired.
Take the part to a hardware store
If you’re not certain which replacement you need, bring the old parts (cartridge, washers, O‑rings) to a local hardware or home center. Staff can usually match them to the exact size and model. Matching by brand and faucet model is ideal, but dimension matching works in many cases.
Consider replacing all seals while you’re in there
Even if only one washer appears worn, it’s smart to replace all easily accessible rubber parts on that faucet at once. This prevents a new leak from another aging seal a few months later.
Step 4: Clean, Rebuild, and Reassemble the Faucet
Proper cleaning and careful reassembly will give your repair a longer life and smoother operation.
Clean mineral buildup
Use a soft cloth and white vinegar to gently remove mineral deposits from metal surfaces inside the faucet body. Avoid scratching sealing surfaces or using anything too abrasive.
Install new washers and O‑rings
Match the new parts to the exact location and orientation of the old ones. Lightly coat O‑rings with silicone-based plumber’s grease (not petroleum jelly), which helps them seat properly and move smoothly without drying out.
Install the new cartridge or rebuilt stem
- Align any tabs or notches on the cartridge with matching slots in the faucet body. - For compression stems, ensure the new washer is firmly attached and the stem threads in smoothly. Avoid cross-threading—if it doesn’t turn easily by hand at first, back it out and try again.
Tighten retaining nuts gently but firmly
Over‑tightening can crack components or make handles difficult to turn; under‑tightening can cause leaks. Snug the nut down until it’s secure, then add a slight extra turn. If the handle feels stiff later, you can always back it off slightly.
Reinstall handles and trim
Reverse your disassembly steps using your earlier photos as a guide. Install the handle, secure the screw or set screw, and reattach decorative caps.
Step 5: Restore Water, Test for Leaks, and Fine-Tune
A careful test ensures your repair actually solved the problem and didn’t create a new one.
Turn water on slowly
Go back to the shutoff valves under the sink and open them slowly by turning counterclockwise. Opening too fast can send a surge through the faucet and stress new parts.
Check under the sink for leaks
With the faucet off, look and feel for any moisture around the supply connections, shutoff valves, and underside of the faucet. A dry paper towel pressed against joints can help you spot tiny seeping leaks.
Test faucet operation
Turn the faucet on and off several times, using both hot and cold. Verify: - No dripping from the spout when it’s off - Smooth movement of handles or lever - No water seeping from around the handle base or under trim
Adjust if needed
If the handle feels too tight or too loose: - Loosen or tighten the handle screw slightly. - If it’s still stiff, you may have overtightened the retaining nut; remove the handle and back the nut off a fraction of a turn.
Monitor over the next day
Check the faucet and cabinet again after a day of normal use. Intermittent drips or slight dampness under the sink may indicate a seal that needs a bit more tightening or, in rare cases, a misaligned cartridge that needs to be reseated.
Conclusion
Fixing a dripping faucet is one of the most practical DIY home repairs you can learn. You cut water waste, lower your utility bill, and avoid the cost and scheduling hassle of a service call. By taking your time with shutoff, disassembly, part identification, and careful reassembly, you turn an annoying drip into a quick win—and build the confidence to tackle the next repair on your list.
Sources
- [U.S. Environmental Protection Agency – Fix a Leak Week](https://www.epa.gov/watersense/fix-leak-week) - Explains how household leaks, including faucets, waste water and why fixing them matters
- [Family Handyman – How to Fix a Leaky Faucet](https://www.familyhandyman.com/project/how-to-fix-a-leaky-faucet/) - Practical walkthroughs with photos for multiple faucet types
- [The Home Depot – Leaky Faucet Repair Project Guide](https://www.homedepot.com/c/ah/how-to-fix-a-leaky-faucet/9ba683603be9fa5395fab908d6fc780) - Step‑by‑step DIY instructions and part identification tips
- [Moen – Cartridge Replacement Instructions](https://www.moen.com/customer-support/installation-replacement-parts) - Official guidance for replacing cartridges in common Moen faucet models
- [This Old House – How to Fix a Leaky Faucet](https://www.thisoldhouse.com/plumbing/21017610/how-to-fix-a-leaky-faucet) - Expert tips for diagnosing faucet types and performing repairs
Key Takeaway
The most important thing to remember from this article is that this information can change how you think about Home Repair.


