Drafty doors and windows waste energy, raise your utility bills, and make your home uncomfortable. The good news: you can fix a lot of those air leaks in a weekend with basic tools and some weatherstripping. No major remodel, no special skills—just a straightforward repair that pays you back every month.
This guide walks you through five clear steps to find and seal drafts around doors and windows so your home stays warmer in winter, cooler in summer, and cheaper to run year-round.
Step 1: Find Where the Drafts Are Coming From
Before you buy anything, figure out exactly where air is leaking.
Walk your home slowly, especially on a windy or cold day, and check:
- Around exterior doors (top, bottom, latch side, and hinge side)
- Around window frames and sashes (where the moving part meets the frame)
- Along baseboards on exterior walls
- Around outlets and switches on exterior walls
- Where pipes, vents, or cables enter or leave the house
Use these simple tests:
- Hand test: Slowly move your hand around edges and corners. You’ll feel cool air where leaks are worst.
- Flashlight test (nighttime): Have someone shine a flashlight from outside along door and window edges while you stand inside. If you see light, air can get through.
- Paper strip test (for doors): Close the door on a piece of paper. If you can easily pull it out without resistance, the seal is weak in that spot.
Make a quick list of every drafty spot you find. Group them by “doors” and “windows” so you can choose the right materials in the next step.
Step 2: Choose the Right Weatherstripping Materials
Weatherstripping isn’t one-size-fits-all. The right choice depends on the size of the gap, how often the door or window moves, and your budget.
For doors, common options include:
- Adhesive foam tape:
- Best for: Small to medium gaps around jambs (sides and top)
- Pros: Cheap, easy to install
- Cons: Wears out faster, especially on high-traffic doors
- V-strip (tension seal):
- Best for: The sides of doors or double-hung windows where two surfaces meet
- Pros: Flexible, durable, nearly invisible
- Cons: Requires more careful measuring and installation
- Door sweep (for the bottom of the door):
- Best for: Gaps between the door and threshold
- Pros: Big impact on drafts, blocks dust and bugs too
- Cons: Needs to be cut to size; must be lined up carefully
For windows, consider:
- V-strip: Great where sashes slide up and down or sideways.
- Foam tape: Good for fixed parts of the frame or windows that aren’t opened often.
- Rope caulk (temporary): Presses into gaps around older windows; removable in warmer months.
When buying, check:
- Gap size: The packaging usually lists a range (for example, seals gaps up to 1/4").
- Material: Vinyl or silicone usually lasts longer than very cheap foam.
- Color: Choose a color close to your trim so repairs blend in.
Take a quick photo of your door or window and measure the width of the frame before heading to the store. It’ll help you pick the right length and style the first time.
Step 3: Prep Surfaces So the Weatherstripping Actually Sticks
Poor prep is one of the main reasons weatherstripping fails early. A few minutes of cleaning and layout saves you from having to redo the job later.
Do this before installing:
Clean the surface
- Wipe down door and window frames with a mild cleaner or soapy water. - Remove dust, grease, old adhesive, and loose paint. - Let everything dry completely before you stick anything on.
Remove old weatherstripping if it’s failing
- Gently pry off brittle or loose pieces with a putty knife or flat screwdriver. - Scrape away old adhesive, then wipe with rubbing alcohol if needed. - Sand lightly if the surface is very rough, then wipe clean.
Check how the door or window closes
- Open and close it a few times. - Look for areas where it already rubs against the frame. Don’t add thick material there or you might keep it from latching. - Mark obvious gap spots lightly with a pencil so you know where to concentrate.
Measure before cutting
- Measure each side of the frame separately. Don’t assume opposing sides are equal. - Add an extra inch or two to each piece so you can trim for a tight fit at the end.
Doing this prep once means your new seals will stick better, last longer, and actually close off the leaks you found.
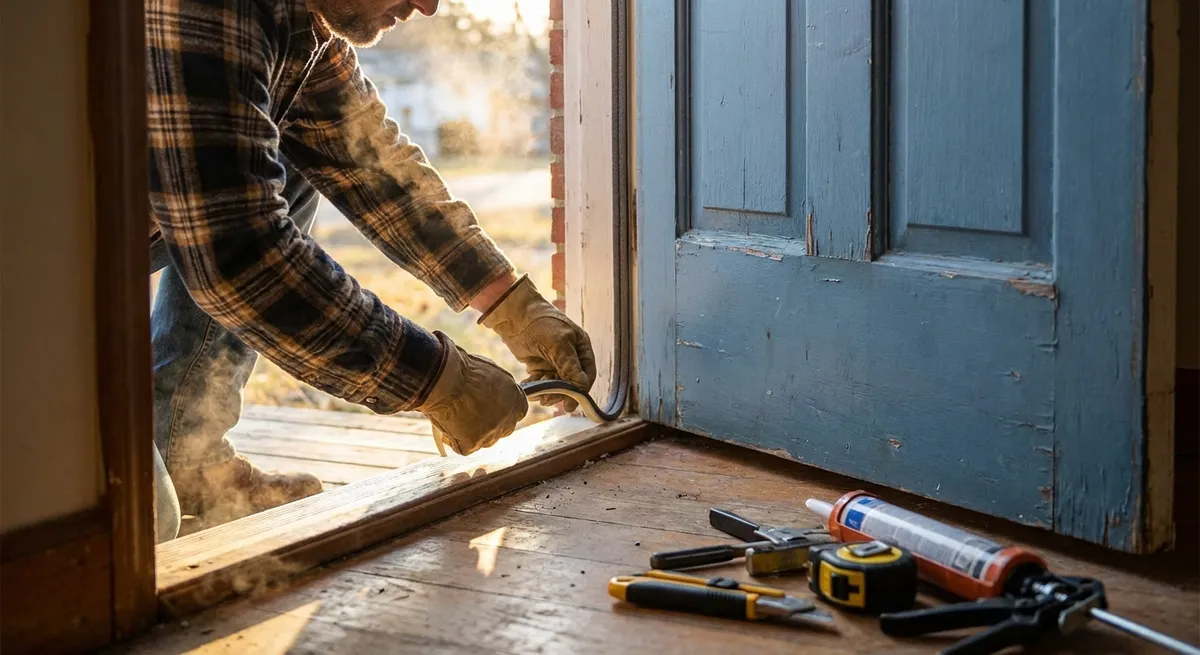
Step 4: Install Weatherstripping on Doors
Now you’re ready to seal those gaps. Work on one door at a time so you can test as you go.
Tools you’ll likely need:
- Tape measure
- Pencil
- Scissors or utility knife
- Screwdriver or drill (for sweeps or nail-on products)
- Safety glasses if you’re cutting metal or drilling
A. Seal the sides and top of the door
Start at the latch side (where the door closes and latches):
- Cut a piece of foam tape or V-strip slightly longer than the side. - Peel a short section of the backing and line it up where the door meets the frame. - Stick it down gradually, pressing firmly as you go. Don’t stretch it; stretched foam shrinks back and leaves gaps.
Repeat on the hinge side if needed:
- Be careful here: too thick and the door may not close properly. - Close the door gently as you test-fit. If it’s hard to shut, choose a thinner seal.
Install along the top (head jamb):
- Measure and cut a piece to span the top. - Install so it lightly touches the top edge of the door when closed.
Check your work:
- Close the door and look for light around the edges. - The seal should be snug but not crushed flat. Adjust if the door is difficult to latch.
B. Install or replace the door sweep
Measure the door width:
- Mark the sweep to match. Most can be cut with a hacksaw (for metal) and scissors or a knife (for the rubber part).
Position the sweep:
- With the door closed, hold the sweep against the inside bottom edge. - The rubber or brush should just touch the threshold, not drag heavily on the floor.
Attach the sweep:
- Mark screw hole locations with a pencil. - Pre-drill small pilot holes if needed, then screw the sweep in place. - Test the door: it should open and close smoothly while sealing the gap.
Fine-tune:
- If it drags, loosen the screws and nudge it up slightly. - If you still see daylight, lower it or switch to a style designed for larger gaps.
Once finished, repeat the flashlight or hand test. You should feel a noticeable reduction in air movement around that door.
Step 5: Seal Drafty Windows and Check Your Results
Windows often have more moving parts than doors, so take your time and test frequently as you install.
A. Apply V-strip or foam to windows
For double-hung windows (that slide up and down):
- Open the window and clean the tracks and sides.
- Measure where the sash meets the frame when the window is closed.
Install V-strip along the sides of the frame where the sash slides:
- Cut to length. - Peel backing and press it into the corner where the sash meets the frame. - Make sure the V faces the direction of compression when the window closes. 4. Add foam tape where the upper and lower sashes meet if there’s a noticeable gap.
For casement or sliding windows:
- Check the sealing edge—where the moving pane closes against the frame.
- Use thinner, durable weatherstripping (like V-strip or high-density foam) on surfaces that make contact when closed.
- Avoid bulky foam on parts that slide; it will wear out quickly or jam the window.
B. Use rope caulk for stubborn or seasonal gaps
If you have older windows with small, irregular gaps:
- Warm the rope caulk slightly in your hands so it’s easier to mold.
- Press it into cracks and gaps around the frame, particularly where the trim meets the wall.
- Smooth it with a finger or a putty knife so it seals tightly.
- Remove in warmer months if you need to operate the window more often.
C. Test your improvements
After you’ve installed weatherstripping:
- Repeat the hand test on a colder day. You should feel far less draft.
- Listen for outside noise—often, a better seal will slightly reduce sound as well.
- Watch your thermostat and comfort level over a week or two. Rooms that were always chilly near windows should feel more even.
If a door or window is now hard to operate, you likely used weatherstripping that’s too thick in one area. Remove that section and swap in a thinner product rather than forcing it—forcing can damage hinges, latches, or the window frame.
Conclusion
Sealing drafts with weatherstripping is one of the simplest home repairs that delivers real, measurable benefits: lower energy bills, fewer cold spots, and a more comfortable home. By taking the time to locate leaks, choose the right materials, prep surfaces properly, and test as you go, you can get professional-quality results with basic tools.
You don’t need to fix every gap in one day. Start with your worst door, then the draftiest window, and build from there. Each small improvement stacks up—one weekend at a time—to a tighter, more efficient home that feels better in every season.
Sources
- [U.S. Department of Energy – Air Sealing Your Home](https://www.energy.gov/energysaver/air-sealing-your-home) - Explains how air leaks affect comfort and energy use, plus recommended sealing methods
- [ENERGY STAR – Guide to Weatherstripping](https://www.energystar.gov/campaign/seal_insulate/methods/weatherstripping) - Overview of common weatherstripping types and where to use them
- [University of Massachusetts Amherst – Weatherization: Caulking and Weatherstripping](https://ag.umass.edu/energy/resources/home-energy-resources/weatherization-caulking-weatherstripping) - Practical guidance on choosing and installing weatherstripping in homes
- [Natural Resources Canada – Keep the Heat In: Air Sealing](https://natural-resources.canada.ca/energy-efficiency/homes/canadas-housing-efficiency-programs/keep-the-heat/air-leakage-control/15737) - Detailed discussion of air leakage testing and sealing strategies for residential buildings
Key Takeaway
The most important thing to remember from this article is that this information can change how you think about Home Repair.


