A dripping faucet is more than just an annoying sound. It can stain your sink, waste gallons of water, and hint at bigger plumbing issues. The good news: most common leaks are simple enough for a careful DIYer to handle in under an hour, with basic tools you probably already own.
This guide walks you through how to diagnose and repair a standard leaky faucet in clear, step-by-step language. Even if you’ve never taken a faucet apart before, you’ll learn what to look for, what to replace, and how to put everything back together without creating a bigger mess.
Know Your Faucet: What You’re Working With
Before you grab a wrench, identify what type of faucet you have. The internal parts differ slightly, and knowing the type makes it easier to understand what’s leaking and why.
Most household sink faucets fall into one of these categories:
- Compression faucets – Separate hot and cold handles that you turn multiple times to open/close. They use rubber washers that wear out and are a very common source of drips.
- Cartridge faucets – Single lever or two-handle faucets that move smoothly with a simple up/down or side-to-side action. Inside is a replaceable cartridge that controls flow and temperature.
- Ceramic disk faucets – Usually a single lever on a wide, cylindrical body. They use two ceramic disks to control water and are durable but can still wear or get debris inside.
- Ball faucets – Often older single-handle kitchen faucets with a rounded cap and many internal parts. More complex, but still repairable with a kit.
Not sure what you have? Search the brand and visible model details (often on the faucet base) or compare your faucet to diagrams on the manufacturer’s website. This will help when buying replacement parts and prevent you from forcing parts that don’t fit.
Tools, Materials, and Prep: Set Yourself Up to Succeed
A leaky faucet repair is low risk, but a little prep prevents headaches. Gather what you need before you shut the water off.
Basic tools:
- Adjustable wrench
- Phillips and flathead screwdrivers
- Allen (hex) wrench set (for many single-handle faucets)
- Needle-nose pliers
- Utility knife (helpful for old caulk or stubborn caps)
- Old toothbrush or small nylon brush
- Clean rags or paper towels
- Small bowl or tray for screws and parts
Common repair materials:
- Replacement washers, O-rings, or a full cartridge kit (brand-specific)
- Plumber’s grease (silicone-based)
- Plumber’s tape (PTFE tape) if you disconnect supply lines
- White vinegar for mineral deposit removal
Prep steps:
- Clear the sink area. Remove everything from the basin and under-sink cabinet so you can move freely and find dropped parts.
- Plug the drain. Use the built-in stopper or a simple rubber plug. Tiny screws and springs love to fall into open drains.
- Take reference photos. Before you loosen anything, take clear photos from multiple angles. These are your “map” for reassembly.
- Work in good light. Use a bright task light or flashlight so you can see small parts and cracks on seals or cartridges.
Now you’re ready to shut off the water and start the actual repair.
Step 1: Safely Turn Off the Water and Relieve Pressure
You never start any plumbing repair with live water in the lines. Turning off the water is simple but important.
- Locate the shutoff valves. Look in the cabinet under the sink. You should see two small valves on the hot and cold supply lines (usually chrome or brass with oval or round handles).
- Turn both valves clockwise until they stop. Do not overtighten; snug is enough.
- If there are no local shutoffs, you’ll need to turn off the main water supply to the house (usually near where the main line enters the home or at a basement/crawlspace wall).
- Turn on the faucet. Open both hot and cold handles (or move the single lever through its full range) to relieve any pressure and drain remaining water.
- Double-check that water is off. Leave the faucet open. If no water comes out after a few seconds, you’re clear to begin.
If the shutoff valves themselves won’t turn or start leaking when you move them, stop and address those first. Old or stuck valves may need replacement—a separate but worthwhile repair to avoid future problems.
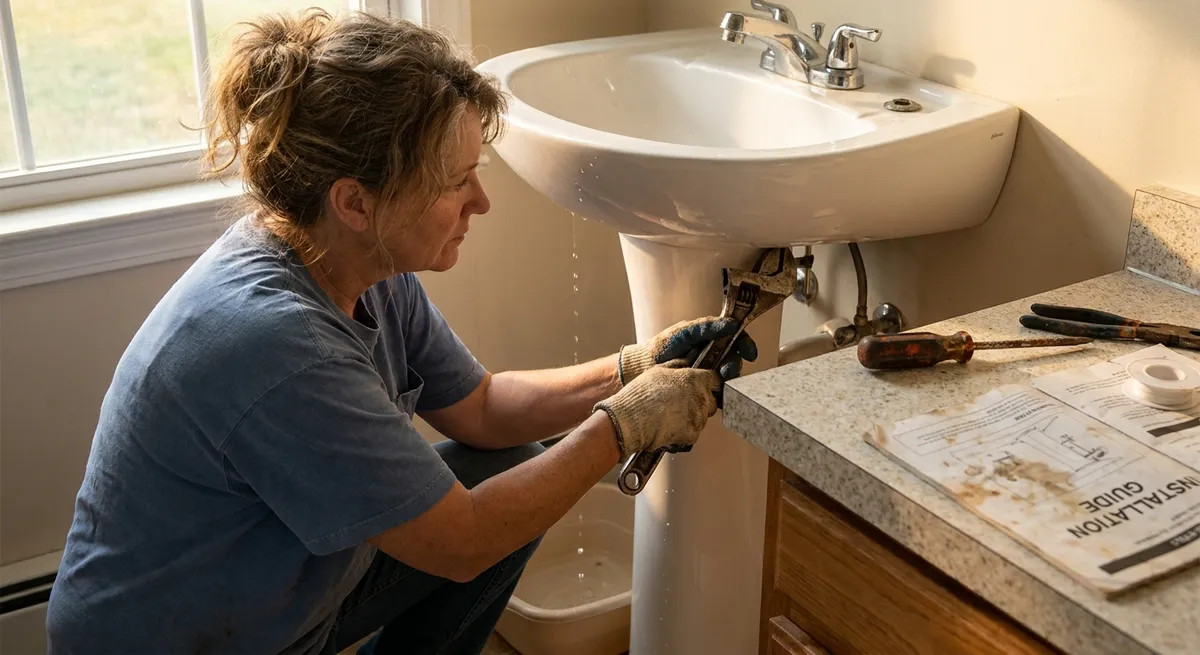
Step 2: Disassemble the Faucet Without Losing Parts
This is where your phone camera and small tray earn their keep. The goal is to get the working parts out—handles, cartridges, stems, washers—without damaging decorative finishes or small fasteners.
- Remove decorative caps. Many handles have a hot/cold cap hiding a screw. Gently pry off with a small flathead screwdriver or utility knife. Wrap the tool tip with tape to avoid scratching.
- Unscrew handle fasteners. Use the correct screwdriver or Allen wrench to remove the screw inside the cap area. Place it immediately in your tray.
- Lift off the handle. Some handles pull straight up; others may need a gentle wiggle. If it feels stuck:
- Apply a small amount of penetrating oil around the base.
- Wiggle side to side, not straight-up brute force, to avoid cracking it.
- Remove retaining nuts or caps. Under the handle, you’ll often see a decorative cap or a retaining nut. Use an adjustable wrench sized correctly to avoid rounding the edges. Turn counterclockwise to remove.
- Extract the cartridge, stem, or ball assembly. Grip gently with pliers if needed, pulling straight up.
- For compression faucets, you’ll remove the entire stem assembly that contains the washer.
- For cartridge faucets, pull the cartridge straight out—note its orientation.
- Lay everything out in order. As you remove parts, place them on your work surface in the order you took them off. Take a photo at each step for backup.
If a part really won’t budge, don’t force it. Too much torque can crack the faucet body or break internal parts, turning a small repair into a full replacement.
Step 3: Inspect, Clean, and Identify the Real Source of the Leak
Not all drips come from the same failure. Look closely at the parts you removed and where the water was actually leaking from.
Common leak patterns:
- Drip from the spout tip: Usually worn washers, O-rings, or a failing cartridge.
- Leak from around the handle: Typically a bad O-ring or cartridge seal.
- Leak at the base of the faucet: Often failed O-rings or degraded seals at the body.
What to check:
- Washers and O-rings (compression faucets).
- Look for flattened, cracked, or hardened rubber.
- Check the screw holding the washer—it should be intact and snug.
- Cartridge surfaces (cartridge and disk faucets).
- Look for cracks, chips, or worn rubber seals.
- Check for mineral buildup (white, chalky crust) that can prevent a tight seal.
- Valve seats (inside the faucet body).
- Shine a flashlight into the body where the washer sits.
- If the surface is rough or pitted, it may need to be cleaned or replaced with a seat tool.
- O-rings around the faucet stem or base.
- Look for swollen, brittle, or broken rubber.
Clean where you can:
- Soak mineral-crusted parts (metal only) in a small bowl of white vinegar for 15–20 minutes, then scrub gently with a toothbrush.
- Wipe the faucet body interior with a damp cloth to remove debris.
- Avoid using metal tools directly on sealing surfaces; they scratch easily.
Once you know which parts are damaged, you can either reinstall temporarily to restore water while you buy parts, or head to the store with the failed components in hand.
Step 4: Replace Worn Parts and Reassemble with Care
This is where the actual fix happens. Having the correct replacement part is half the battle.
Get the right replacements:
- Match parts by brand and model if possible. Many cartridges and kits are brand-specific. Check the manufacturer’s site, installation manual, or part number printed on the old cartridge.
- Bring old parts to the hardware store. Staff can often match a cartridge, washer, or O-ring by sight and measurement.
- Buy a kit when in doubt. Many manufacturers sell full repair kits that include all seals, springs, and cartridges for a certain style of faucet.
Installing the new parts:
- Lightly coat O-rings and rubber seals with plumber’s grease. This helps them slide into place without twisting and extends their life. Use only a very thin layer.
- Install new washers on compression faucets.
- Remove the old washer screw, discard the washer.
- Place the new washer in the same orientation and tighten the screw snugly, but don’t strip it.
- Insert the new cartridge or stem.
- Align it in the same orientation as the original (this is where your reference photos help).
- Press or slide it firmly into place until fully seated.
- Reinstall retaining nuts or clips.
- Hand-start the threads to avoid cross-threading.
- Tighten with a wrench just until snug; overtightening can crack the faucet body or deform seals.
- Reattach handles and decorative caps.
- Install the handle screws and tighten firmly but not excessively.
- Snap the decorative caps back into place.
Work methodically. If something doesn’t seem to fit, stop and re-check the part number or compare it to your photos of the original part.
Step 5: Turn the Water Back On and Test for a True Fix
The last step is making sure your repair actually worked—and that you didn’t create any new leaks.
- Close the faucet. Make sure handles are in the “off” position or the lever is down/centered.
- Slowly open the shutoff valves.
- Turn each valve counterclockwise a bit at a time.
- Watch under the sink and around the faucet body as you do this.
- Check for leaks at connections.
- Look closely around the base of the faucet, handle area, and underneath where supply lines connect.
- Feel with your fingers for any moisture—small leaks can be hard to see.
- Run the faucet.
- Open and close it several times.
- Run both hot and cold individually if you have separate supplies.
- Check that the flow feels normal and the handle movement is smooth.
- Watch for a few minutes.
- Turn the faucet off and check the spout tip for any slow drip.
- Re-check under the sink after 5–10 minutes.
- Clean up and remove your drain plug.
- Wipe surfaces dry so you can spot any new leaks later.
- Put items back under the sink only after you’re confident everything is dry.
If a minor drip remains, recheck that the cartridge or stem is fully seated and that the retaining nut is snug. A tiny amount of extra tightening (without overdoing it) often solves a persistent drip—but if not, double-check that you have the correct replacement part.
Conclusion
Fixing a leaky faucet is one of the most useful home repair skills you can learn. The job mostly comes down to five careful steps: safely shutting off the water, disassembling the faucet without damage, inspecting and cleaning the internals, replacing the worn parts, and testing your work thoroughly.
Once you’ve done this repair once, you’ll be much more confident tackling other small plumbing issues—like replacing old shutoff valves, swapping out a faucet entirely, or dealing with a slow-flow aerator. And you’ll save money every month by not letting water drip straight down the drain.
If at any point you run into corroded pipes, cracked faucet bodies, or shutoff valves that won’t operate, that’s a safe moment to call a licensed plumber. But for most ordinary drips, you now have a straightforward repair process that keeps your sink (and your water bill) under control.
Sources
- [U.S. Environmental Protection Agency – Fix a Leak Week](https://www.epa.gov/watersense/fix-leak-week) – Explains how common household leaks waste water and offers basic guidance on identifying and fixing them.
- [The Family Handyman – How to Fix a Leaking Faucet](https://www.familyhandyman.com/project/how-to-fix-a-leaking-faucet/) – Step-by-step faucet repair examples with photos for different faucet types.
- [This Old House – How to Fix a Leaky Faucet](https://www.thisoldhouse.com/plumbing/21015283/how-to-fix-a-leaky-faucet) – Detailed walkthrough with visual aids, including cartridge and compression faucet repairs.
- [Moen Official Support – Cartridge Replacement Instructions](https://www.moen.com/customer-support/installation-instructions) – Brand-specific installation and replacement instructions for Moen faucet cartridges and parts.
Key Takeaway
The most important thing to remember from this article is that this information can change how you think about Home Repair.


