A slow drip under the bathroom sink can turn into swollen cabinets, mold, and a repair bill you don’t want. The good news: most minor faucet leaks are completely fixable with basic tools and a little patience. This guide walks you through tracking down the leak, making the repair, and putting everything back together so it actually stays dry.
Whether you’re brand-new to DIY or you’ve already got a toolbox ready, these steps will help you handle a common home repair before it becomes real damage.
Understand Where the Leak Is Really Coming From
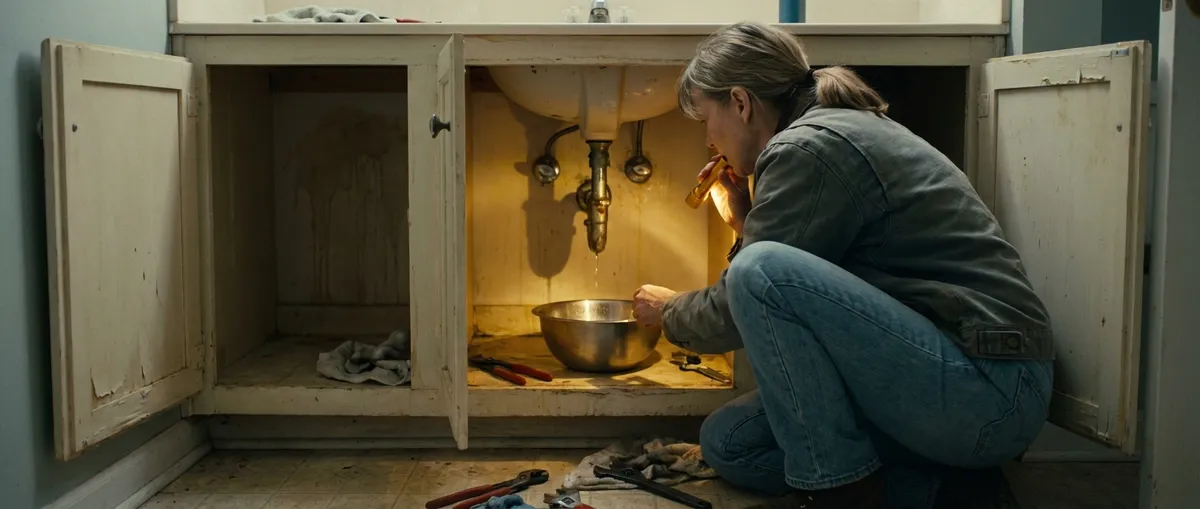
Before you grab a wrench, you need to figure out exactly what’s leaking. Water under a sink can travel along pipes, drip off the lowest point, and fool you into fixing the wrong thing.
Start by emptying the cabinet so you can see all the plumbing clearly. Dry everything with a towel, then place a dry paper towel under the P-trap and supply lines. Turn the faucet on and off, then watch closely with a flashlight. Check three common leak spots:
- Supply line connections – where the flexible lines connect to the shutoff valves and to the faucet.
- Drain assembly – where the sink drain meets the bowl and where the P-trap connects.
- Faucet body and base – water sometimes runs behind the sink and drips down under the cabinet.
If the leak only appears when the faucet is running, suspect the drain or faucet body. If it shows up even when the faucet is off, focus on supply lines or shutoff valves. Confirm by gently running your fingers around joints and connections; if one area suddenly feels wet, you’ve found your starting point.
Step 1: Safely Shut Off Water and Power in the Area
Before loosening anything, stop the water and remove any electrical risks.
Turn the small shutoff valves under the sink clockwise until they stop—one for hot, one for cold. If they’re stuck or don’t fully close and water keeps flowing, you may need to shut off the main water supply to the house. The main shutoff is usually near where the water line enters your home or near your water meter.
Next, if you have an outlet or light inside the vanity or a nearby GFCI outlet that could get sprayed, turn off the relevant breaker at your electrical panel. You don’t want water dripping onto a live outlet.
Finally, open the faucet to release any water pressure still in the lines. Keep a bucket and towels close by; even with the water off, you’ll get some drips when you loosen fittings.
Step 2: Fix Leaky Supply Lines and Shutoff Valves
If the water is clearly coming from the flexible lines or the small shutoff valves, tackle these first—they’re a common source of leaks and usually straightforward to repair.
Start by gently tightening the compression nuts on the supply lines with an adjustable wrench, turning about a quarter-turn at a time. Don’t crank them down hard; overtightening can damage the fitting and cause new leaks. After a small adjustment, turn the water back on and test. If the leak stops, you’re done with this part.
If tightening doesn’t fix it, shut the water off again and remove the supply line. Inspect both ends for cracks, rust, or stripped threads. Flexible lines are inexpensive—if you see any damage, replace the entire line rather than trying to patch it. When installing new lines, hand-tighten first, then snug them with a wrench just enough to seal.
If the leak is coming from the shutoff valve stem (where the handle joins the valve), try tightening the small packing nut just behind the handle. A slight turn can compress the packing material and stop a slow seep. If the valve body itself is corroded or cracked, plan to replace the valve—this may be a bigger job and sometimes calls for a plumber if you’re not comfortable cutting and reattaching pipes.
Step 3: Reseal a Leaky Drain and P-Trap Connection
When water only appears under the sink while the faucet is running down the drain, your issue may be in the drain assembly or trap, not the faucet.
Place a bucket under the P-trap (the curved section of pipe) and loosen the slip nuts by hand or with a pair of channel-lock pliers. Remove the trap and inspect the rubber or plastic washers (gaskets). Hardened, cracked, or misshapen washers can’t seal properly and should be replaced. Take one with you to the hardware store to match the size and style.
Next, check the connection where the sink drain meets the basin. On many sinks, a large nut and a layer of plumber’s putty create the seal. If you see corrosion or obvious gaps, you may need to completely remove the drain flange, clean off old putty, and reseal it. Roll fresh plumber’s putty into a thin rope, press it around the underside of the drain flange, and tighten it back into the sink. Wipe away excess putty that squeezes out.
Reassemble the P-trap, making sure each washer is seated correctly and facing the right direction (the beveled side usually faces the joint). Hand-tighten the slip nuts, then give them a small additional turn with pliers—just enough to snug. Run water for a minute and watch every joint closely. If you see a slow drip, try an additional small turn, but stop if you feel significant resistance.
Step 4: Repair Leaks at the Faucet Base or Handles
If water pools around the faucet on top of the sink or drips from the base underneath when the faucet runs, the faucet body or its seals may be the problem.
From above, dry the area around the faucet and run the water. If you see water creeping out around the faucet base, you may need to remove the faucet and reseal it with silicone or new gaskets. Under the sink, use a flashlight to locate the mounting nuts that hold the faucet down. Loosen these carefully with a basin wrench (a specialty tool that reaches tight spots) or an adjustable wrench.
Once the faucet is free, lift it off the sink. Scrape away old plumber’s putty or silicone from the sink surface. Clean and dry thoroughly. Many modern faucets include rubber or foam gaskets; inspect them for cracking or deformation. Replace them if needed, or apply a thin bead of 100% silicone caulk around the faucet base before reinstalling.
Set the faucet back in place, align it, and retighten the mounting nuts from below. Tighten evenly to compress the gasket or silicone, but don’t overdo it—too much pressure can distort gaskets or crack porcelain sinks. Wipe away any squeezed-out silicone, let it cure as directed on the tube, then test for leaks again.
Step 5: Test, Monitor, and Prevent Future Damage
Once you’ve made your repairs, don’t slam the cabinet door and forget it. A proper fix includes testing under “real use” conditions and setting yourself up to catch problems early.
Turn on both hot and cold water at normal pressure and let them run for a few minutes. Use a dry paper towel or your fingers to check every connection—supply lines, shutoff valves, drain joints, and the underside of the faucet. Look for any beads of water starting to form. If you catch a tiny seep, try a small additional turn on the related fitting.
When everything stays dry during the test, line the cabinet bottom with a plastic tray, vinyl shelf liner, or even a shallow baking sheet. This gives future leaks somewhere to show up before they soak into wood. Consider placing a small, inexpensive leak detector alarm in the cabinet; these battery-powered devices beep loudly when they sense water.
Finally, add a simple reminder to your calendar to open the cabinet and inspect the plumbing every few months. Early detection is the difference between wiping up a few drops and replacing a rotted vanity.
Conclusion
A leaking bathroom faucet setup can look intimidating at first, but most issues come down to worn washers, loose fittings, or tired sealant. By taking time to find the real source of the leak, shutting off water safely, and working through each connection step by step, you can stop the drip and protect your cabinets from long-term damage.
With basic tools, careful testing, and periodic checks, you’ll keep that space under your sink dry—and save yourself from the kind of hidden water damage that always seems to show up at the worst possible time.
Sources
- [U.S. Environmental Protection Agency – Fixing Household Leaks](https://www.epa.gov/watersense/fix-leak-week) - Overview of common home water leaks and why fixing them matters
- [Family Handyman – How to Fix Leaking Sink Drains](https://www.familyhandyman.com/project/how-to-fix-leaking-sink-drains/) - Step-by-step guidance on repairing sink drain leaks and P-traps
- [This Old House – How to Replace a Bathroom Faucet](https://www.thisoldhouse.com/bathrooms/21015106/how-to-replace-a-bathroom-faucet) - Detailed instructions and visuals for removing and reinstalling faucets
- [Lowe’s – How to Replace a Shut-Off Valve](https://www.lowes.com/n/how-to/replace-a-shut-off-valve) - Explains shutoff valve issues and replacement basics
- [Energy.gov – Water Heating and Leaks](https://www.energy.gov/energysaver/water-heating) - Background on water use and the impact of leaks on energy and utility bills
Key Takeaway
The most important thing to remember from this article is that this information can change how you think about Home Repair.


