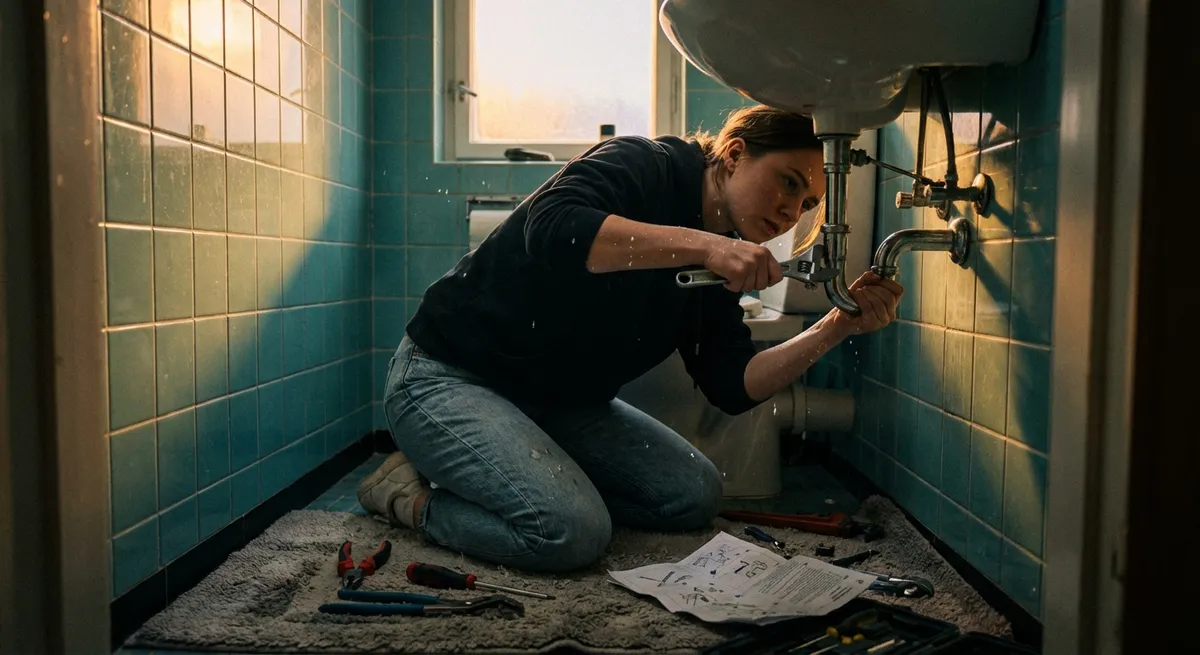
A dripping faucet is more than an annoyance—it wastes water, raises your bill, and can even stain your sink over time. The good news: most common faucet leaks are simple enough for a careful DIYer to fix in under an hour, with basic tools you probably already own. This guide walks you through the process step by step so you can stop the drip, save some money, and gain confidence for your next home repair.
Know Your Faucet Before You Start
Before grabbing a wrench, you need to figure out what kind of faucet you have. The internal parts are different, and using the wrong approach can damage the fixture.
Common faucet types:
- Compression faucets – Separate hot and cold handles that turn multiple times to open/close. They use rubber washers that often wear out and cause drips.
- Cartridge faucets – Usually single-handle (sometimes two-handle), with a smooth up/down and side-to-side motion. They use a replaceable cartridge.
- Ceramic disc faucets – Short, quarter-turn handle; very smooth operation. They use two ceramic discs and rubber seals.
- Ball faucets – Single handle with a dome-shaped cap; often found in older kitchen sinks. They use several small parts and springs.
Look closely:
- Check under the faucet or on the trim for a brand name (Moen, Delta, Kohler, etc.).
- Search the brand and model (if visible) online to find an exploded diagram and part numbers.
- If you can’t find a model number, identify the type visually and match parts at a hardware store.
Knowing the type helps you choose the right replacement parts and avoid unnecessary trial and error.
Tools, Parts, and Prep
A bit of preparation will make this job smoother and prevent accidental damage.
Basic tools:
- Adjustable wrench or small wrench set
- Phillips and flathead screwdrivers
- Allen (hex) key set (for some handle types)
- Needle-nose pliers
- Utility knife (for old, stuck O-rings or caulk)
- Towel or rag
- Small bowl or tray to keep screws and parts organized
Possible replacement parts:
- Rubber washers (for compression faucets)
- O-rings
- Cartridge (for cartridge faucets; ideally brand-specific)
- Faucet repair kit (some brands offer full kits by model)
- Plumber’s grease (not petroleum jelly)
Prep steps before you begin:
- Clear the area under the sink so you can reach shutoff valves and work comfortably.
- Plug the drain with a stopper or rag so you don’t lose small screws or parts.
- Take reference photos on your phone at each stage of disassembly. It’s easy to forget which way a part was facing when you reassemble.
- Lay out a towel on the counter to protect the faucet finish and keep parts from rolling away.
Step 1: Turn Off Water and Release Pressure
Stopping the water supply is non‑negotiable. Even a small mistake here can turn a drip fix into a mini flood.
- Locate the shutoff valves under the sink. You should see two small valves on the hot and cold lines.
- Turn both valves clockwise until they stop. Don’t over-torque—firm is enough.
- If you don’t have shutoff valves, you’ll need to turn off the main water supply to the house. This is usually near your water meter or where the main line enters the home.
- Once the water is off, open the faucet at the sink to relieve any pressure and drain remaining water from the line.
- Keep the faucet in the open position while you work. This helps confirm the water is fully off and prevents pressure from building.
Tip: If shutting off the main water affects others in your home, let them know before you start, and pick a time when water use is low.
Step 2: Remove the Handle and Expose the Valve
Next, you’ll get access to the internal parts that actually control water flow.
Find the handle screw:
- Many faucets have a small decorative cap (often marked “H” or “C”) that gently pries off to reveal a screw. - Single-handle faucets may have a small set screw on the side or back of the handle, requiring an Allen key. 2. Use the appropriate screwdriver or Allen key to remove the handle screw, then gently pull the handle off. Rock it side to side if it’s stuck; avoid using excessive force or metal tools on visible surfaces.
With the handle off, you’ll typically see:
- A packing nut or retaining nut (compression and some cartridge faucets). - A decorative cap that unscrews (ball and ceramic disc faucets). 4. Take a clear photo of what you see before removing anything else. 5. Carefully use an adjustable wrench to loosen the packing/retaining nut, turning counterclockwise. Protect the finish by placing a cloth between the wrench and the faucet if needed.
Tip: If a nut is stuck, apply a small amount of penetrating oil and let it sit for a few minutes—don’t force it and risk twisting the entire faucet.
Step 3: Remove and Inspect the Internal Parts
This is where you’ll find the usual suspects: worn washers, cracked cartridges, or tired O-rings.
- Gently pull out the stem (compression faucets) or cartridge (cartridge faucets). For ball or disc faucets, follow a brand-specific guide if you can find one, because they have more small pieces.
- As you remove parts, lay them out in order on your towel. Keep them oriented the same way they came out.
Inspect for:
- Cracked or stiff rubber washers - Flattened or brittle O-rings - Mineral buildup (white, crusty deposits) on parts or inside the faucet body - Any visible cracks in a cartridge or ceramic disc 4. If the washer is held on by a screw at the end of the stem, remove the screw and slide off the old washer.
Check the valve seat inside the faucet body:
- Shine a flashlight inside. - Look for roughness, pitting, or damage where the washer sits. - Some valve seats are removable with a seat wrench; others are part of the body. 6. Use a cloth or small brush to clean off mineral deposits. For stubborn buildup, you can dab on a little white vinegar, let it sit, then scrub gently and rinse.
Tip: If you’re unsure which part is failing, it’s often worth replacing all rubber components (washers and O-rings) while you have everything apart. They’re inexpensive, and it reduces the chance you’ll need to reopen the faucet soon.
Step 4: Replace Washers, O-Rings, or Cartridge
Now you’ll install fresh parts so the faucet can seal properly again.
Match your parts carefully:
- Take the old washer, O-rings, or cartridge to the hardware store. - Match size, shape, and brand exactly. For cartridges, it often needs to be the same model number.
For compression faucets:
- Install the new washer on the end of the stem and secure it with the screw. - Replace any O-rings on the stem with new ones. Lightly coat them with plumber’s grease to reduce friction and improve the seal.
For cartridge faucets:
- Remove any O-rings from the old cartridge and note their position. - Install the new cartridge in the same orientation as the old one (your photos help here). - Replace O-rings as needed, lightly greased with plumber’s grease.
For ball or ceramic disc faucets:
- Follow the brand’s repair kit instructions. These usually include new springs, seats, and seals or new discs. - Keep everything aligned as shown in your reference photos. 5. Before reassembling, wipe the inside of the faucet body with a clean cloth to remove debris. 6. Carefully insert the stem or cartridge back into the faucet body, ensuring it seats fully and correctly.
Tip: Don’t skip the plumber’s grease (made for potable water). It helps parts move smoothly and extends the life of rubber seals.
Step 5: Reassemble, Test for Leaks, and Fine-Tune
This final step is about putting everything back together and confirming the leak is gone.
- Reinstall the packing/retaining nut and tighten it snugly with a wrench. Don’t overtighten—this can damage threads or make the handle hard to turn.
- Put the handle back on, aligning it properly with the stem or cartridge.
- Reinstall the handle screw, then replace any decorative caps.
- Slowly turn on the shutoff valves under the sink (counterclockwise). Do this gradually so water pressure builds up gently.
With the faucet handle in the off position, watch closely:
- Check around the base of the handle. - Look under the sink for any drips from the supply lines or faucet connections. 6. Turn the faucet on and off several times, testing hot and cold to ensure smooth operation and no leaks.
If you notice a small drip around the stem:
- Slightly tighten the packing nut (1/8–1/4 turn). - Test again. If it becomes too stiff, back the nut off slightly. 8. Let the faucet sit off for a few minutes and check again. A successful repair means no drips from: - The spout - Around the handle - Under the sink connections
Tip: If the faucet still drips from the spout after replacing washers or the cartridge, you may have a damaged valve seat or the wrong replacement part. At that point, re-check the model, or consider taking the stem/caps and clear photos to a plumbing supply store for guidance.
Conclusion
Fixing a leaky faucet is a straightforward project that can save you money on your water bill and prevent slow damage to your fixtures. By shutting off the water, working methodically, and replacing worn internal parts, you can usually stop the drip in under an hour with basic tools. Even if you’re new to DIY, this repair is a solid confidence builder and a useful skill you’ll use again—faucets don’t last forever, but you don’t need to replace the whole fixture every time something starts to leak.
If you run into a faucet that doesn’t match the steps here or you discover corrosion, cracks, or damaged valve seats, don’t hesitate to check the manufacturer’s instructions or call a pro. The goal is a safe, clean, and lasting repair—not a guessing game with your plumbing.
Sources
- [U.S. Environmental Protection Agency – Fixing Leaks at Home](https://www.epa.gov/watersense/fix-leak-week) - Explains how household leaks waste water and why fixing drips matters
- [Family Handyman – How to Fix a Leaky Faucet](https://www.familyhandyman.com/project/how-to-fix-a-leaky-faucet/) - Step-by-step faucet repair guidance with photos and diagrams
- [Moen – Faucet Cartridge Replacement & Support](https://www.moen.com/customer-support/help-faq/faucet/cartridges) - Official instructions and diagrams for various Moen faucet cartridges
- [Delta Faucet – Repair Parts and Technical Documents](https://www.deltafaucet.com/service-parts) - Brand-specific repair information and part lookups for Delta faucets
- [U.S. Department of Energy – Water Use and Efficiency](https://www.energy.gov/energysaver/save-water) - Overview of water use in homes and ways to improve efficiency
Key Takeaway
The most important thing to remember from this article is that this information can change how you think about Home Repair.


