Unexpected leaks, drafts, and weird noises have a way of showing up at the worst possible time. You don’t need to be a pro to tackle many of these problems—you just need a clear plan, basic tools, and a little patience. This guide walks through five core home repairs, step by step, so you can stop small issues before they turn into expensive headaches.
Each repair is beginner-friendly, safe to attempt with common tools, and designed to give you a visible, confidence-boosting result.
1. Fix a Leaky Faucet (Compression or Cartridge Style)
A dripping faucet wastes water and money, and the constant sound is annoying. Most leaks come from worn-out internal parts you can replace in under an hour.
Tools & Materials
Adjustable wrench, screwdriver set, replacement washer or cartridge (match to your faucet model), plumber’s grease, towel.
Step‑by‑Step
Shut off the water supply
Look under the sink for two shutoff valves (hot and cold). Turn them clockwise until they stop. Open the faucet to relieve pressure and make sure water is fully off.
Plug the drain and prep the area
Use a sink stopper or a rag to block the drain so you don’t lose screws or small parts. Lay a towel in the sink to protect the surface and catch any drips.
Remove the handle and access the inner parts
Pry off any decorative cap with a flathead screwdriver to reveal the handle screw. Remove the screw and pull off the handle. You’ll see a retaining nut or clip holding the stem or cartridge in place—loosen it with an adjustable wrench or screwdriver.
Identify and replace the worn part
For compression faucets, remove the stem and replace the rubber washer and/or O-ring at the base. For cartridge faucets, pull the cartridge straight up and out. Take the old part to a hardware store or check the manufacturer’s website to get an exact match.
Reassemble and test for leaks
Lightly coat O-rings or moving parts with plumber’s grease. Reinstall the cartridge or stem, tighten the retaining nut (snug, not over-tight), and reattach the handle. Turn the water supply back on slowly and test the faucet in both hot and cold positions. If it still drips, double-check that the new parts are seated correctly and that you replaced all seals.
2. Silence a Squeaky Floor from Above (Without Opening the Ceiling)
Squeaky floors usually happen when subflooring loosens from the joists and rubs as you walk. You can often fix this from the room side, without major demolition.
Tools & Materials
Drill/driver, stud finder, wood screws (trim-head or flooring screws), construction adhesive (optional), painter’s tape, pencil.
Step‑by‑Step
Find the squeak source
Walk slowly across the area and mark squeaky spots with painter’s tape. Have someone else walk while you listen and feel carefully for movement or flex underfoot.
Locate floor joists under the squeak
Use a stud finder set to deep scan or joist mode to find joists under the floor surface. Mark their lines lightly with a pencil along the noisy area. Joists typically run in one consistent direction; once you find one, you can measure over 16" or 24" to find others.
Secure the subfloor to the joists
At each noisy spot, drive a trim-head wood screw through the flooring into the joist below. Go slowly and stop when the screw head is just below the surface. On hardwood, pre-drill a small pilot hole to avoid splitting. Avoid using nails—screws hold better and are less likely to loosen again.
Add adhesive if the movement is significant
If you feel noticeable flex, drill a small angled pilot hole beside the squeak into the joint between floorboard and joist. Inject construction adhesive through the hole (some brands come with injection tips). Wipe away excess and allow it to cure as directed before heavy traffic.
Fill and finish screw holes (for visible flooring)
For hardwood, fill screw holes with color-matched wood filler or wax sticks. For carpeted floors, you can often drive the screw through the carpet pile carefully and let the fibers hide the head. Test-walk the area again. If a squeak persists, move an inch or two in each direction and add additional screws along the joist line.
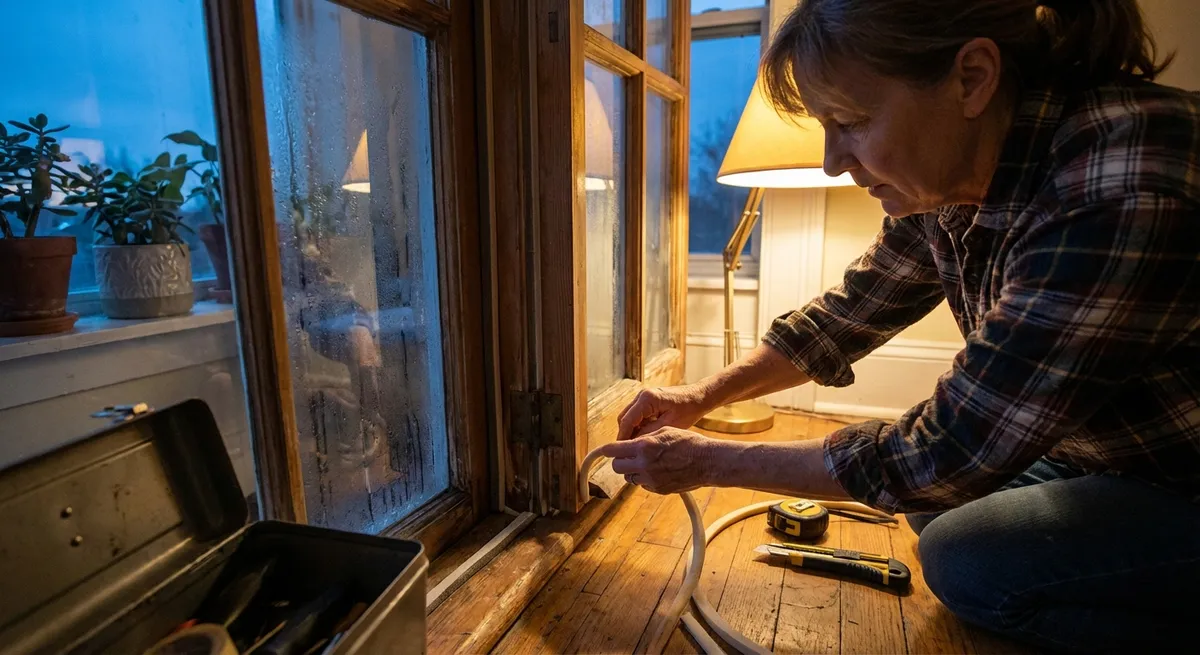
3. Seal a Drafty Window to Cut Energy Loss
Drafty windows can make a room uncomfortable and spike your heating and cooling bills. In many cases, you can dramatically improve comfort with simple sealing and weatherstripping—no window replacement needed.
Tools & Materials
Caulk gun, exterior-grade caulk (for outside), paintable interior caulk (for inside), weatherstripping tape or foam, utility knife, rag, mild cleaner.
Step‑by‑Step
Identify draft points
On a windy day, run your hand around the edges of the window frame and sash. You can also use a lit incense stick or a thin tissue—watch for smoke or paper moving. Note gaps at the trim, frame, and where the moving sash meets the fixed frame.
Clean and dry all surfaces
Wipe down window frames and nearby wall surfaces with a mild cleaner and allow them to dry completely. Caulk and weatherstripping adhere poorly to dust, grease, or moisture, so don’t rush this step.
Apply weatherstripping to moving parts
For double-hung or sliding windows, add adhesive-backed foam or rubber weatherstripping where the sash meets the frame. Cut pieces to size with a utility knife and press firmly into place. Ensure the window still opens and closes without binding; trim if needed.
Caulk the non-moving gaps
Use exterior-grade caulk outside where the window frame meets the siding, and paintable interior caulk inside where the trim meets the wall or frame. Run a continuous bead, then smooth it with a damp fingertip or caulk tool. Avoid caulking weep holes or any designed drainage points at the bottom of the frame.
Check your work and reassess comfort
After the caulk cures (follow the tube’s instructions), re-test the area for drafts with your hand or tissue. You should feel a clear difference in temperature and air movement. If the window is still noticeably drafty, the glass seal or frame may be failing—at that point, consider professional evaluation for repair or replacement.
4. Secure a Loose Towel Bar or Wall-Mounted Rack
A wobbly towel bar or coat rack can rip out of drywall if ignored. Fixing it properly means anchoring it into solid material or using the right anchors for hollow walls.
Tools & Materials
Drill, screwdriver, drywall anchors or toggle bolts, stud finder, level, pencil, tape measure, spackle (if patching old holes).
Step‑by‑Step
Remove the loose fixture and inspect the damage
Loosen the small set screws under the towel bar brackets or back of the rack. Remove the fixture and check the existing screw holes. If the drywall is crumbled or enlarged, you’ll need new holes or better anchors.
Locate a stud if possible
Use a stud finder where the fixture will sit. Anchoring into a stud is always strongest. Mark stud locations, and see if you can align at least one bracket or mounting plate over a stud while keeping the fixture at a usable height.
Decide on anchors and new mounting points
If a stud isn’t available at all mounting locations, choose appropriate drywall anchors or toggle bolts rated for the expected load. Mark new screw locations with a pencil, ensuring they’re level and spaced correctly for your towel bar or rack.
Drill pilot holes and install anchors
Drill pilot holes according to your anchor’s size instructions. Insert the anchors (tap gently with a hammer if needed). For toggle bolts, insert the folded toggle through the hole, then tighten lightly until the wings grab the backside of the drywall.
Mount the fixture and patch old holes
Screw the mounting brackets or backplate into the anchors and/or studs. Use a level as you tighten to keep it straight. Once secure, attach the bar or rack to the brackets. Fill any old holes with spackle, let dry, then sand and touch up with paint. Test by gently adding weight to ensure everything feels solid.
5. Replace a Worn Door Weatherstrip to Fix Light and Air Gaps
If you can see daylight around a closed exterior door, you’re losing conditioned air and possibly inviting pests inside. Replacing the door’s weatherstripping is a quick way to improve comfort and security.
Tools & Materials
Replacement door weatherstripping (match to your style), utility knife, tape measure, screwdriver, hammer and small nails or staple gun (if needed).
Step‑by‑Step
Identify your current weatherstripping type
Open the door and examine the frame. Common types include: - Compression foam on wood frames - Magnetic strip on steel doors - Kerf-in style that presses into a groove in the jamb
Take a small piece with you or snap clear photos before buying replacements.
Remove the old weatherstripping carefully
Starting at one corner, gently pull the weatherstrip away from the frame. For kerf-in types, pull straight out of the groove. For nailed or stapled strips, pry them off with a flat tool, removing any remaining fasteners.
Measure and cut the new pieces
Measure the top and sides of the door frame individually. Cut the new weatherstrip slightly long (about 1/8" extra) so it compresses snugly at the corners. Make clean, straight cuts with a sharp utility knife.
Install the new strips in the correct order
Start with the top piece so the side pieces press against it. For kerf-in strips, press the barbed edge into the groove along the jamb, working from one end to the other. For nail-on types, align the strip so it lightly contacts the door when closed, then fasten every 8–10 inches with small nails or staples.
Test door operation and seal
Close the door and check for: - Even contact all the way around - No visible daylight - Door still latching smoothly without excessive force
If the door is hard to close, you may have it too tight—adjust or re-seat the strip slightly. If light or drafts remain at the bottom, you may also need to adjust or replace the door sweep.
Conclusion
Many everyday home problems—drips, drafts, squeaks, and loose fixtures—are manageable with basic tools and a clear process. By learning how to fix a leaky faucet, quiet a squeaky floor, seal a drafty window, secure wall fixtures, and upgrade door weatherstripping, you’re building real, practical skills that keep your home more comfortable and your repair bills lower.
Start with the repair that bothers you the most right now. Take your time, work methodically, and keep safety first. As each project moves from “annoying problem” to “fixed,” you’ll gain the confidence to tackle the next one.
Sources
- [U.S. Environmental Protection Agency – Fix a Leak](https://www.epa.gov/watersense/fix-leak-week) - Details on how small leaks waste water and basic steps to address common household leaks
- [Energy.gov – Air Sealing Your Home](https://www.energy.gov/energysaver/air-sealing-your-home) - Government guidance on locating and sealing drafts around windows and doors
- [Family Handyman – How to Fix Squeaky Floors](https://www.familyhandyman.com/project/how-to-fix-squeaky-floors/) - Practical methods and illustrations for silencing floor squeaks from above and below
- [This Old House – How to Stop Drafts Around Doors](https://www.thisoldhouse.com/doors/21016456/how-to-stop-drafts-around-doors) - Step-by-step breakdown of weatherstripping and door draft fixes
- [Lowe’s – How to Repair a Leaky Faucet](https://www.lowes.com/n/how-to/how-to-repair-a-leaky-faucet) - Consumer-friendly guide to diagnosing faucet types and replacing internal parts
Key Takeaway
The most important thing to remember from this article is that this information can change how you think about Home Repair.


